How to Create a Facebook Page (Complete Guide for 2025)

Discuss with AI
Get instant insights and ask questions about this topic with AI assistants.
💡 Pro tip: All options include context about this blog post. Feel free to modify the prompt to ask more specific questions!
TL;DR: Creating a Facebook Page takes less than 10 minutes, but the real magic happens when you transform it into a customer engagement engine. This guide walks you through setup AND shows you how to automate responses so you're not drowning in messages while your business actually grows.
Creating a Facebook Page is one of the smartest (and free) ways to establish your business online. We're talking about reaching a piece of over 3 billion monthly active users worldwide. That's not a typo.
A well-crafted Page can help you reach customers, build credibility, and even provide customer support without spending a dime on the basics.
But here's what most guides won't tell you: creating the Page is the easy part. The challenge comes when messages start flooding in and you realize you can't keep up. We'll cover both in this guide.
In this comprehensive walkthrough, you'll learn exactly how to create a Facebook Page in 2025, with step-by-step instructions that skip nothing. Plus, we'll show you how to actually manage it effectively so your Page becomes a business asset, not another time-consuming chore.
A Facebook Page is fundamentally different from your personal Facebook profile. While your personal profile connects with "friends," a Page accumulates followers who choose to connect with your business, brand, or organization.
There's no cap on followers, making it perfect for reaching audiences at scale.
Pages give you a public presence where you can share updates, promote products, list business hours, collect reviews, and engage customers through comments and messages. The best part? Creating a Facebook Page is completely free.
The numbers tell the story. Facebook had about 2.7 billion monthly users in early 2024, and by late 2025 it's around 3.07 billion. This massive user base means your Page can significantly boost your online visibility and customer engagement.
If you're running a business or building a brand, a Facebook Page helps you increase recognition, engage customers, and drive traffic to your website or storefront.
And here's something crucial: people expect to find businesses on Facebook now. Not having a Page can actually hurt your credibility.
Before we jump into creation, gather these essentials:
You must have a Facebook account to create and manage a Page. Pages aren't standalone (they're always created by a profile). Think of yourself as the administrator.
If you don't have an account yet, you'll need to sign up first.
Don't worry about privacy. Your personal profile information won't be visible on the Page, and you can designate others to help manage it later.
Have these details ready:
• Your business or brand name (this becomes your Page name)
• A brief description or tagline about what you do
• Business address (if you have a physical location)
• Phone number and email for customer contact
• Website URL
• Business hours
You can add most of these details after creating the Page, but having them ready speeds up the process.
Prepare two key visuals:
• Profile picture: Usually your logo or professional headshot (displays as a circle)
• Cover photo: A wider banner image representing your brand visually
We'll cover exact dimensions and specs in the setup steps below. Just have high-quality images ready to go.
First, log into your personal Facebook account. Then find the Page creation interface:
Click the menu (grid of dots) at the top right of Facebook's interface and look for "Pages." In the Pages section, click Create New Page.
You can also go directly to facebook.com/pages/create
Tap the menu (☰), tap "Pages," and then tap Create or + Create a New Page.
Facebook will launch the Page creation wizard. If this is your first Page, Facebook might show an introduction or ask you to choose a category (Business or Brand vs. Community or Public Figure).
Most companies and brands will choose Business or Brand. This selection just tailors some fields to your type (the core creation steps stay the same).
Now you'll provide the basic info for your new Page:
This should be your business name, brand, or organization name. Use the exact name or a very clear variant.
For example, if your company is Maple Street Coffee, use that as the Page name.
Avoid all caps or odd punctuation unless your brand is stylized that way. The name you choose appears on the Page and in search results, so make it count.
Facebook requires at least one category for your Page. Start typing a word that describes your business (like "Coffee Shop" or "Marketing Agency") and you'll see suggestions.
You can choose up to three categories that describe your Page. Be as specific as possible. Instead of just "Restaurant," you might choose "Coffee Shop" or "Café" if those fit better.
Specific categories help people understand exactly what you do.
Don't stress too much. You can always edit categories later if needed.
There's a short description field (often labeled "Bio" or "Description") where you can write a brief intro. It's optional during creation, but highly recommended to fill out now.
You have a 255-character limit, so keep it concise. Examples:
→ "Award-winning neighborhood coffee roaster and café in downtown Seattle"
→ "AI messaging platform helping businesses automate customer conversations across WhatsApp, Instagram, and Facebook"
You can update this bio anytime.
As you enter these details on the left side of the screen, Facebook shows a live preview of your Page on the right side. On the left, you fill in your Page details, and on the right you see how it'll look to visitors.
This helps you verify everything looks correct before proceeding.
Once you've filled in the Page Name, Category (at least one), and Description, click the Create Page button (usually a blue button at the bottom).
Congrats! You've technically created the Page.
But it's not complete yet. Facebook will prompt you to add more details like images and contact info before your Page is ready for the public.
Pro Tip: If the Create Page button is greyed out, make sure you've entered a Page Name and selected at least one Category. Both are required.
After clicking "Create Page," Facebook will prompt you to upload your Page's Profile Picture and Cover Photo. These visuals make a critical first impression.
This is the small, round image representing your Page across Facebook. It appears next to your posts in the feed and at the top left of your Page.
For businesses, this is typically your logo. For public figures or professionals, it might be a headshot. Use a clear, high-quality image because it displays as a circle.
On desktop, the profile picture displays at 170 x 170 pixels (and 128 x 128 px on mobile). Facebook crops it into a circle, so avoid putting important details in the corners of a square logo or image.
If using a logo, you might need to adjust its layout to look good in a circular frame.
The cover photo is the large banner image stretching across the top of your Page. It's your canvas to showcase something eye-catching about your business.
Examples: a photo of your product, your team, your storefront, or a branded graphic.
On desktop, cover photos display at 820 x 312 pixels (640 x 360 on mobile). Facebook recommends an image size of about 851 x 315 px for best results.
Choose a cover image that conveys your brand's personality or highlights a key offering.
You can update the cover photo anytime. Some brands even change it seasonally or for campaigns.
Quick Reference: Image Specifications
| Image Type | Desktop Display | Mobile Display | Recommended Size |
|---|---|---|---|
| Profile Picture | 170 x 170 px | 128 x 128 px | High-res, circular crop |
| Cover Photo | 820 x 312 px | 640 x 360 px | 851 x 315 px minimum |
Click "Add Profile Picture" and "Add Cover Photo" in the setup panel and select an image file from your device (or drag and drop into the upload area).
After adding each image, you'll get a preview. You can reposition the images if needed by dragging to adjust the cropping.
While you're here, add a Call-To-Action (CTA) button to your Page. Facebook's setup interface includes an "Add Action Button" option.
This button appears at the top of your Page (below your cover photo) and can prompt visitors to take action like:
• "Send Message"
• "Call Now"
• "Sign Up"
• "Shop on Website"
• "Start Order"
Choose the CTA that aligns with your goal. A restaurant might use "Call Now" for reservations, whereas a software company might use "Sign Up" or "Learn More."
Facebook's built-in CTA buttons make it easy for people to get in touch or take action. You can set this up now or add one later, but it's highly recommended to have a CTA on your Page.
Once you've uploaded your profile and cover images (and added a CTA button if desired), click Save or Next. Your images will be applied to the Page.
You can always change these visuals later, but having them from the start makes your Page look professional immediately.
This step is about claiming a unique username for your Page, which gives you a custom Facebook URL. By default, your Page's URL will be something like facebook.com/Your-Page-Name-1234567890 (with a long ID number).
But you can set a simpler address, like facebook.com/YourBusinessName, which is easier to share and looks more professional.
On your new Page, look for the option to "Create @Username" (often a button beneath your Page name in the left sidebar, or under the cover photo). Click that to set your public username (also known as a vanity URL).
Your username can be up to 50 characters, but keep it short and related to your business name if possible.
For example, if your Page name is "Maple Street Coffee," you might choose @MapleStCoffee or @MapleStreetCoffee as the username, assuming it's not already taken. Facebook will tell you if the name is available.
→ Use your brand name or a close variant
→ Avoid special characters and spaces (you can use periods or capitals for readability, like @Maple.Coffee, but it's not case-sensitive)
→ Make it easy to remember
→ If your first choice is taken, try a slight variation (perhaps add a location or keyword like @MapleStCoffeeSeattle if it's location-specific)
Once you enter an available username, click Create Username. Facebook will confirm with a message like "You have set the username @YourName."
After that, your Page's direct link will be facebook.com/YourUsername. This is perfect for sharing on business cards, social media, or anywhere else to promote your Facebook presence.
Note: New Pages may sometimes need to meet certain criteria (like having a few followers or a profile picture) before you can set a username. This is a spam-prevention measure. If Facebook doesn't let you create a username immediately, add some activity (images, a post, maybe a friend likes it) and try again.
Usually, you can set it up from the start, though.
Next, you'll want to fill in important information about your business so visitors have everything they need. On the desktop interface, there should be an Edit Page Info section (Facebook may have taken you there automatically, or you can find it in Settings or Manage Page menu).
Here are the key Page info sections to fill out:
Add a phone number (especially if you want customers to call you), an email address, and your website URL. These will be publicly visible on your Page so customers can reach you.
If you prefer not to list a phone or email, you can leave them blank (they're optional).
If you're a local business or have a physical storefront, enter your address. Once added, Facebook will show a map on your Page.
If your business doesn't serve customers at a public location, you can skip the address or mark "no physical location". You can also specify a service area (cities or regions you serve) if relevant.
If you have opening hours, list them (e.g., Mon-Fri 9am-5pm, Sat 10am-2pm). This helps people know when you're available.
There are options for businesses that are always open, permanently closed on certain days, or providing services online only.
In addition to the short description you provided earlier, there may be an "Additional Information" or "More Info" section where you can put a longer description, your mission, founding date, or other custom fields depending on your Page type.
Fill in what makes sense for you.
If you didn't set your @username in Step 4, you can set it here as well under the general Page Info settings.
Some fields cover legal info like your Privacy Policy URL (useful if you're collecting data or selling on Facebook) or an Impressum (required in some countries like Germany). Provide these if applicable.
Facebook allows you to list:
• Products (what you sell)
• Price Range (e.g. $, $$, $$$)
• Other social media accounts (Instagram, Twitter, YouTube, etc.)
It's a good idea to connect your other socials for consistency. If you have an Instagram profile, link it here so visitors can find it.
Fill out as many of these details as you can. Providing comprehensive info makes your Page look credible and helps customers get the info they need without leaving Facebook.
All changes you make on the Page Info edit screen are saved automatically. There's usually no save button (you'll see a small confirmation like "Changes saved").
Also, review your About section on the Page itself (the public-facing view of the info you entered). Make sure everything looks accurate.
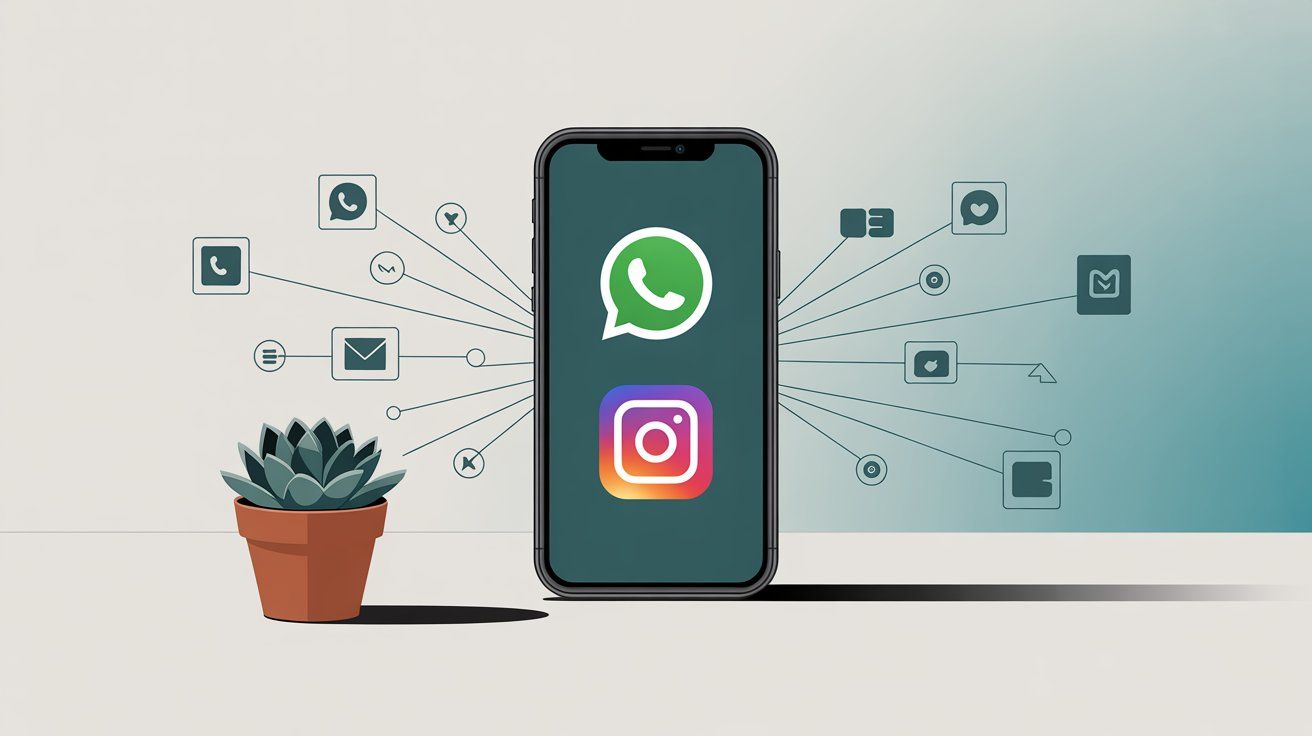
Facebook offers an optional integration with WhatsApp, which is incredibly useful if many of your customers use WhatsApp to communicate. This step is particularly valuable for businesses in regions where WhatsApp is popular (India, LATAM, Europe, etc.).
If you don't use WhatsApp for your business, you can skip this. But it's worth knowing about.
When creating your Page, Facebook's setup wizard might have a step that says "Connect WhatsApp to Your Page." It will ask for a WhatsApp number and then send a verification code to confirm the link.
By linking a WhatsApp Business number, you can add a WhatsApp button to your Facebook Page. This places a prominent "Message on WhatsApp" button on your Page, so visitors can click it and start a WhatsApp chat with your business instantly.
If you want to do it now, follow the prompt: enter your WhatsApp phone number (make sure it's the number you use for WhatsApp Business, and that you have that phone handy), then enter the code you receive.
Facebook will connect the accounts and add the WhatsApp contact button to your Page.
If you prefer to do this later (or weren't prompted during setup), you can always link a WhatsApp number via your Page settings. Go to Settings → Linked Accounts or look for WhatsApp in the Page settings.
It gives customers another instant way to reach you. The messaging volume on Meta's platforms is massive. Over 100 billion messages are exchanged on Facebook's apps each day (WhatsApp, Messenger, etc.).
People love the convenience of messaging. By enabling WhatsApp on your Page, you cater to users who might prefer texting over calling or emailing. It can boost your responsiveness and lead to more inquiries.
Here's the reality: once you connect WhatsApp, enable Messenger, and maybe link Instagram DMs, you're managing messages across multiple platforms. This gets overwhelming fast.
Quick question: Do you really want to juggle three separate inboxes? Probably not.
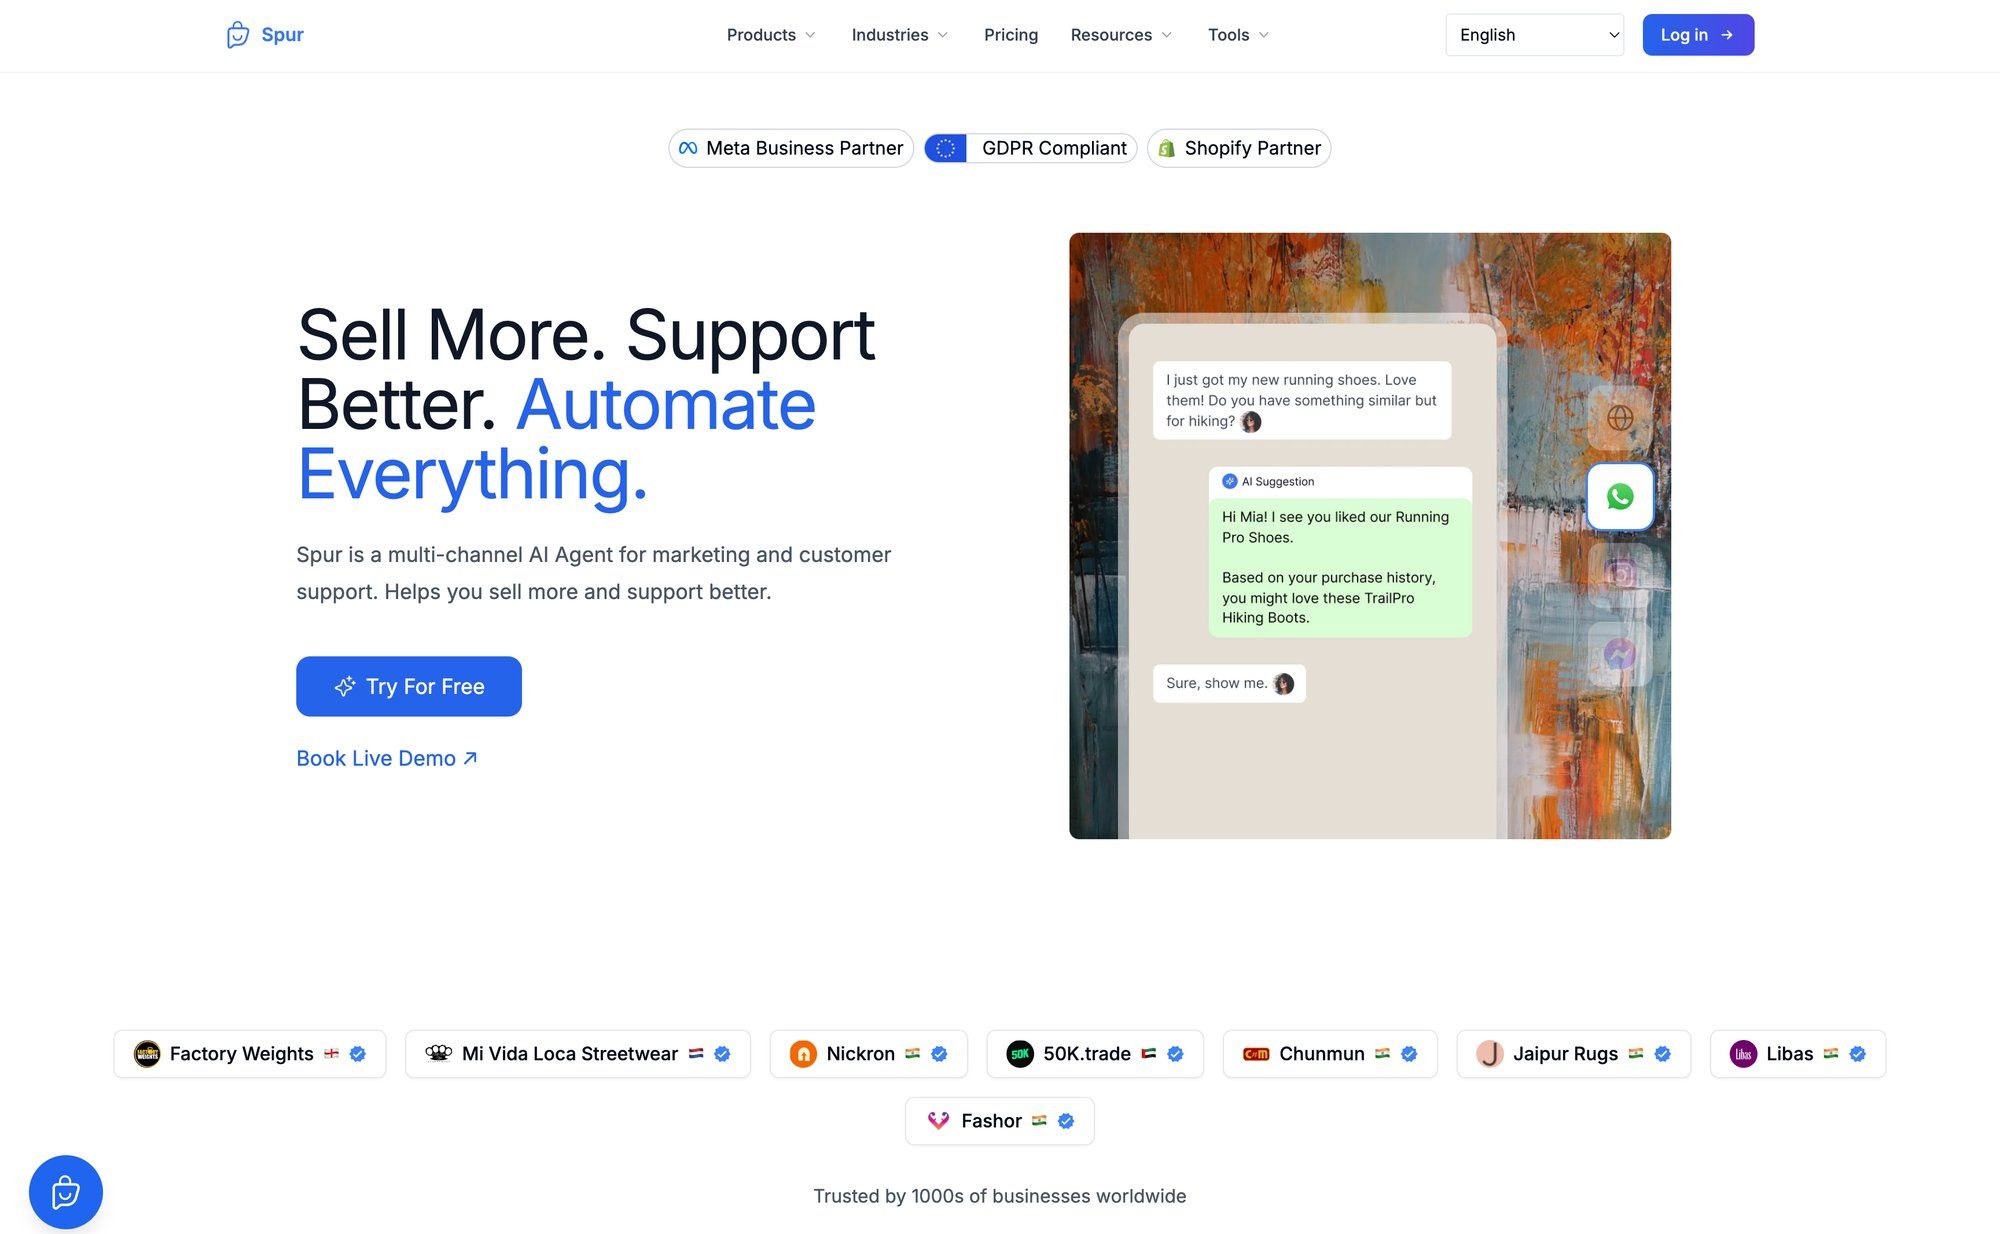
This is where tools like Spur become invaluable. Spur is an official Meta Business Partner that unifies all your messaging channels (Facebook Messenger, Instagram DMs, WhatsApp, and even website live chat) into one shared inbox.
But it goes beyond just consolidation. Spur's actionable AI agents can handle repetitive questions automatically because they're trained on your actual knowledge base and business data.
Unlike basic chatbots that just answer FAQs, Spur's AI can track orders, book appointments, update records, and more. When a conversation gets complex, it seamlessly hands off to your human team with full context preserved.
For businesses serious about customer engagement without drowning in messages, this kind of automation isn't optional anymore. It's how you scale.
We'll dive deeper into message automation after the setup steps.
Before you start inviting the world to your new Page, take a moment to review your Page's settings. Click on Settings (typically a tab on the left menu on desktop, or under the gear icon).
Here are a few key things to check:
Decide how you want to receive notifications for Page activity. By default, if you're the Page admin, Facebook can notify you (within Facebook and/or via email) about new messages, comments, reviews, etc.
It's wise to keep notifications on, especially on Facebook itself, so that even when you're using Facebook as your personal profile you'll see alerts for Page activity.
The setup wizard likely asked you about this ("Stay informed about your Page" with toggles for notifications on your profile and email).
Make sure you enable notifications in a way that suits you, so you don't miss any engagement. You can always adjust these settings later if you get too many alerts.
If you have team members or partners who will help manage the Page, you should add them and assign appropriate roles.
By default, the profile that created the Page is the Page Admin (full control). You can invite others to be Editors, Moderators, Advertisers, or Analysts depending on what you want them to do.
For example:
• An Editor can almost do everything an Admin can (post content, respond to messages, etc.) except manage roles and settings
• A Moderator can respond to messages and comments but can't post as the Page
To add someone, go to Page Settings → Page Roles. Enter the person's name or email (they must have a Facebook account) and assign a role from the dropdown. They'll get an invitation to accept.
This is useful if you have a social media manager or co-founder who needs access. Ensure you trust anyone you make an Admin (Admins have full power to change Page info and even remove other admins).
Under settings, look at Messaging options. Here you can set an Instant Reply (an automatic greeting sent to anyone who messages your Page) and other preferences.
Facebook allows some basic autoresponders. For instance, you can set up an instant greeting like "Hi, thanks for reaching out! We'll reply ASAP."
Consider enabling this if you expect many messages, so customers aren't met with silence.
But here's the thing: Facebook's basic autoresponders can only do so much. According to customer expectations research, customers now expect immediate responses. It's become the baseline for online customer service.
Anything you can do to acknowledge messages quickly will help. Auto-replies can handle common questions after hours, which keeps customers engaged.
For more advanced chatbot capabilities, you might integrate with a third-party tool or Facebook's Messenger API. This is where platforms like Spur really shine with their AI-powered automation.
Facebook Pages have different layout templates (e.g., a template for Businesses, for Nonprofits, for Restaurants, etc.) which arrange your tabs (Home, About, Photos, Reviews, Services, etc.) in ways that make sense for your type of business.
In Settings → Templates and Tabs, you can check if the default template suits you. For most, the Standard template is fine. But if you're a restaurant, you might switch to the Restaurants template to get a Menu tab, for example.
You can also reorder or toggle off certain tabs here.
If you want to set up a profanity filter or block certain words from being posted to your Page, you can do that in settings (often under General or Moderation settings).
For a new small Page this might not be needed right away, but be aware of it if your Page grows or if you encounter spam.
Most default settings are okay to start with, but familiarize yourself with what's available in the Settings menu. Facebook's Help Center is a useful reference if you're curious about specific settings.
One more thing: Facebook provides the Meta Business Suite (formerly Facebook Business Manager) as a centralized tool to manage your Page (and Instagram account if linked), create posts, view insights, run ads, etc.
When your Page is new, you can manage it just fine from the Facebook interface. But as you grow, you might start using Business Suite (business.facebook.com) for more advanced control, especially if you run ad campaigns or schedule lots of content.
It's free to use, and your Page will automatically be accessible there since you're an admin. Something to keep in mind for the future (you don't need to dive into it on day one, but it's good to know it exists as your Page management hub beyond the basic interface).
Your Facebook Page is now set up with all the essential information! Before you announce it to the world, you should do two things: publish some content and invite some initial followers.
A brand-new Page with no content looks empty and unprofessional. Share a welcome post or any update to get started.
Click on Create Post on your Page (you can usually find the post composer on the Home tab of your Page). Craft a first post that introduces your Page or provides value to visitors.
Examples:
→ "Hello Facebook! We're excited to launch the official Page for [Your Business]. Stay tuned for updates, exclusive deals, and more."
→ Share a useful tip, a photo of your store or team, an announcement of an upcoming event, etc.
Make it engaging and on-brand. This gives new visitors something to read or interact with when they find your Page.
You can post text, images, videos, links, or even create a poll or event. Facebook also allows Stories and Reels for Pages now. For a first post, simple is fine. Even a nice photo with a caption works well.
The key is to have at least one post so the Page isn't blank.
Facebook provides an "Invite Friends to like your Page" feature. Use it! Especially for your first batch of followers, your personal Facebook friends and existing customers can help.
On your Page, look for the … menu or an Invite Friends button. You can select some of your personal Facebook friends to send an invite to "like" your Page.
Be thoughtful here. It's often best to invite friends who genuinely might be interested in your business or will support you, rather than spamming everyone.
A personal note or message outside of Facebook can also be effective: share your Page link on your personal profile or other social media and say, "We just launched our new Facebook Page, please check it out!"
Beyond friends, consider inviting your existing customer base. You might send an email to your customers with a link to your new Page, or announce it on your website. The goal is to get some followers and engagement early on, which makes your Page look active and credible.
Also, engage with your Page as yourself. Like the post you made, leave a comment as the Page owner thanking folks for their support. The more activity, the better the Page will start to populate on people's feeds.
Finally, if you have other channels (Instagram, Twitter, LinkedIn, etc.), cross-promote your new Facebook Page there to direct followers over.
At this point, you've done it. You have a Facebook Page that's officially up and running!
So you've created your Page. Messages will start coming in. At first, it's manageable. Then it's not.
This is where most businesses hit a wall. You're juggling Facebook Messenger, Instagram DMs, maybe WhatsApp, and possibly live chat on your website. Each question needs a response. Each response takes time.
And customers expect replies immediately.
Facebook offers basic instant replies and away messages. They're better than nothing, but they're not smart. They can't answer specific questions, they can't take actions, and they definitely can't learn your business.
What you actually need is actionable AI that doesn't just answer questions, but can actually do things for your customers.
This is where platforms like Spur change the game entirely.
Here's what makes it different:
Instead of checking four different apps for messages, Spur consolidates everything into one shared inbox:
Your team sees all conversations in one place. No more switching between tabs or missing messages.
Unlike generic chatbots, Spur's AI agents are trained on your actual business data. Your website content, your FAQs, your product information.
When customers ask questions, they get accurate answers specific to your business.
This is a massive differentiator. Generic bots sound robotic and unhelpful. Trained AI sounds like it actually understands your business (because it does).
Here's where it gets really powerful. Spur's AI doesn't just answer questions. It can take actions:
→ Track order status by connecting to your backend systems
→ Book appointments or schedule calls
→ Update customer records in your CRM
→ Process refund requests with proper verification
→ Handle cart recovery flows automatically
This is what "actionable AI" means. It's not a fancy FAQ bot. It's an agent that does work.
When a conversation gets complex or requires a human touch, Spur's system automatically routes it to your team with full context preserved.
The customer doesn't repeat themselves. Your team sees the entire conversation history and can pick up right where the AI left off.
This is how you scale customer support without sacrificing quality.
The choice between basic auto-replies and actionable AI agents determines whether your customer support scales efficiently or becomes a bottleneck.
Businesses using Spur report handling 60-80% of inquiries automatically, which frees up their team to focus on high-value interactions and complex issues.
Think about what that means:
• Faster response times (customers get instant answers)
• Lower support costs (fewer people needed to handle volume)
• Better customer experience (no waiting, accurate answers, seamless handoffs)
• More revenue (automated cart recovery, after-hours sales)
Plus, Spur is an official Meta Business Partner, so you know the integrations are solid and the platform follows Meta's best practices.
If you're serious about using your Facebook Page for customer engagement (and you should be), consider setting up proper automation from the start.
Starting with basic auto-replies is fine for day one. But as your Page grows, plan for a real automation strategy.
It's the difference between scaling smoothly and burning out your team.
Spur offers a free trial if you want to explore what modern customer messaging automation looks like. No commitment, just a chance to see how much time you could save.
Creating the Page is just the beginning. To truly get value from it, you'll want to keep it active and leverage Facebook's tools:
Keep posting content regularly, whether it's daily, a few times a week, or even weekly. Consistency matters.
Share updates about your products, behind-the-scenes peeks, customer testimonials, relevant articles, or even memes (if it fits your brand voice). An active page keeps followers engaged and attracts new ones.
Use a mix of media: text, images, videos, Stories, live videos, etc., to see what your audience responds to.
When people comment on your posts or send you messages, respond! Facebook is a two-way platform.
Thank people for positive comments, answer questions promptly, and handle any criticisms or issues professionally. Quick and helpful responses (especially to messages) can improve your Page's reputation.
Facebook may even display a "Very responsive to messages" badge if you reply fast enough.
Remember, customers often expect near-immediate answers on social media. Immediate response is now considered a baseline expectation. If you find it challenging to keep up, consider using features like saved replies or chat automation as mentioned earlier.
Explore features like:
• Events (to promote events or webinars)
• Offers (to give special discounts)
• Jobs (to post job openings)
• Shop (you can set up a Facebook Shop tab to sell products directly if that's relevant)
Facebook continues to add features for Pages. For example, you can link a Facebook Group to your Page to build a community space. Many experts recommend using Groups to foster deeper engagement around your brand.
If you have the bandwidth, a Facebook Group for your best customers or for discussion can complement your Page nicely.
Don't shy away from using Facebook Live or posting videos.
Live videos can be a great way to interact in real-time, whether it's a Q&A session, a behind-the-scenes tour, or a live sale/demo of your product. They often get good reach and send notifications to followers.
Real-time engagement can humanize your brand. As one marketing expert notes, going live with authentic content gives your audience something they "can't scroll past."
If you sell products, live streams (even live shopping events) can boost sales. Some businesses report higher conversion rates through live product demos.
Example of Excellence: Take a look at how major brands like Nike design their Facebook Pages. They combine professional visuals, consistent branding, strategic content, and active engagement to create a compelling business presence.
Notice the polished cover photo, clear profile picture, prominent call-to-action buttons, and a mix of content types (videos, images, stories). This is the kind of professional presence you're building toward as you grow your own Page.
Beyond inviting friends, think about broader promotion.
Add "Follow us on Facebook" links or icons on your website, email newsletters, and physical signage in your store. If you have a customer email list, remind them to follow your Page for updates or exclusive deals that you might offer on Facebook.
You can also consider running a Facebook Ad campaign to gain followers or promote your posts. Though for a very new Page, you might first grow organically a bit.
Once your Page has some activity, check out the Insights tab (on desktop) or the metrics in Business Suite.
Facebook provides analytics on your posts' reach, engagement, your follower growth, etc. This can tell you what type of content works best and when your audience is online.
Use these insights to refine your content strategy over time. For example, you might find that your video posts get more shares, or that posts in the evening get better engagement.
Then you can do more of those. Keep experimenting and learning.
Many people will treat your Facebook Page as a customer support channel. They might click the "Message" button to ask questions, or leave reviews and feedback.
Be prepared to use your Page as an extension of your customer service. Set up a friendly tone, respond to reviews (thank happy customers, address issues raised by unhappy ones), and maybe set up some FAQs (Facebook has a feature to set up automated FAQ responses in Messenger).
Efficient and personable communication on your Page can significantly improve customer satisfaction.
Again, this is where smart automation helps. As your message volume grows, having AI-assisted replies means simple queries get instant answers while you focus on complex ones.
This kind of actionable AI can be the difference between overwhelmed support and scalable, efficient customer service.
Finally, keep an eye on new features and updates from Facebook. The platform changes often.
For example, Facebook introduced a new "Page experience" in recent years that changed some admin controls and layouts. By staying informed (following Facebook's official blog or reliable sources), you can take advantage of the latest tools.
Congratulations on creating your Facebook Page! You now have a home base on the world's largest social network for your business or project. With regular care and feeding, your Page can grow into a vibrant community and a valuable marketing automation asset.
Yes, you must have a personal Facebook account to create and manage a Facebook Page. The Page is always tied to at least one personal profile as the administrator.
Your personal information won't be visible on the Page, and visitors will only see the Page's public information. If you don't have a Facebook account yet, you'll need to sign up for one first before creating a Page.
Yes. When you create a Page, Facebook doesn't automatically notify your friends or post about it to your personal profile. The Page is public once created, meaning anyone can find it if they search for it, but it won't be pushed to your friends' feeds unless you specifically invite them or share it on your personal profile.
You can build your Page privately at first and only promote it when you're ready.
Creating a Facebook Page is completely free, and there are no ongoing fees just for having a Page. You can post content, respond to messages, and use most features at no cost.
But if you want to run Facebook Ads to promote your Page or posts, that requires a budget (you set how much you want to spend). Ads are optional, and many small businesses grow their Pages organically without spending on ads initially.
Yes, you can change your Page name, but there are some restrictions. Facebook requires that name changes follow their guidelines (no misleading names, etc.), and you might need a certain number of followers or Page activity before you can change it.
To change your Page name, go to Page Settings, then Page Info, and edit the Name field. Facebook will review the change, which can take a few days. You should only change your Page name if necessary, as frequent changes can confuse your audience.
If you want to temporarily hide your Page, you can unpublish it (this makes it invisible to the public, but you can restore it anytime). Go to Settings, then General, and look for "Page Visibility" to unpublish.
If you want to permanently delete your Page, go to Settings, then General, scroll to "Remove Page," and follow the steps. Be aware that deletion is permanent after a short grace period, and you'll lose all content and followers.
Facebook's Help Center has detailed instructions for both unpublishing and deleting.
For most businesses, a Page is the right choice. Pages are designed for businesses to have a public presence, post updates, run ads, and allow people to follow for news and offers.
Groups are better for building communities and fostering discussion among members. Many successful businesses actually use both: a Page for official announcements and branding, and a Group for deeper customer engagement and community building.
If you're just starting, begin with a Page. You can always add a Group later.
As quickly as possible. Customer expectations have changed dramatically. Research shows that immediate responses are now the baseline expectation for online customer service.
Facebook even awards a "Very responsive to messages" badge to Pages that reply quickly and consistently. Aim to respond within an hour during business hours, and consider setting up an instant reply or auto-response for after hours so customers know you'll get back to them.
For businesses with high message volume, using automation tools to handle common questions instantly can be a game-changer.
Yes, absolutely. You can manage your Page using the Facebook app on your phone, or you can download the Meta Business Suite app (available for iOS and Android) which is specifically designed for managing business Pages and Instagram accounts.
With these apps, you can create posts, respond to messages and comments, view insights, and adjust settings all from your phone. This makes it easy to stay on top of your Page even when you're not at your computer.
Many small business owners run their entire Page from mobile devices.